Local, end-of-summer produce is still bursting with fragrance and flavour
Whether you’ve stashed some away in the freezer for safekeeping or have stone fruit that is quickly peaking, you can pair it with this vegan biscuit recipe so that nothing goes to waste.
Biscuit Recipe
 Photo by Jodie Morgan on UnsplashINGREDIENTS
- 2 cups all purpose flour, plus some for dusting
- ½ cups vegan baking stick, butter substitute, chilled
- ¼ cup of granulated sugar, plus extra for sprinkling
- 2½ tsp baking powder
- ½ tsp baking soda
- ¼ tsp salt (optional, only use if vegan butter substitute is not salted)
- ½ cup full fat coconut milk, plus extra for brushing onto biscuits before baking
- 2 tsp lemon juice
- Freshly grated nutmeg (optional)
INSTRUCTIONS
- Preheat oven to 425.
- With cheese grater, grate chilled butter substitute onto a plate.
- Put back in the freezer and allow to firm up for another 5 minutes.
- Add flour, sugar, baking powder, salt and nutmeg (if using) to a large stand-mixer mixing bowl. Whisk to combine.
- Remove cold butter substitute from the freezer and add to the flour mixture.
- Using fingertips, rub chilled butter into dry ingredients until mixture resembles coarse meal.
- Add coconut milk and lemon juice and using the paddle attachment of your stand mixer, beat together all ingredients on medium speed until dough has come together (10 to 15 seconds).
- Turn out dough onto a floured surface, pat down and work into a 1-inch high square or rectangle. Using a sharp knife, cut into four equal pieces and stack on top of each other.
- Lightly dust rolling space again and before pressing down on stack with a rolling pin to flatten to a workable height.
- Roll out to half-inch thick uniform dough if using it for cobbler; one-inch thick for shortcake or regular biscuits.
- Either cut into squares or triangles or, use a pastry cutter to punch out biscuits into desired size and shape.
- Transfer biscuits to a parchment-lined baking tray.
- If using pastry cutter, gather up dough scraps, re-roll, and punch out more biscuits if needed.
- Add remaining biscuits to the baking tray, then add to the freezer or fridge to chill until cool and firm.
- Before baking, use pastry brush to brush biscuits with extra coconut milk and then top with a generous sprinkle of sugar.
- Add to the oven to bake for 15 minutes until biscuits have risen and are golden.
- Let cool before using or storing in an airtight container for the next day.
Makes approximately 6 biscuits depending on size
1. Summer Shortcake

Ideal for: Summer fruit that still looks as beautiful as it tastes.
Biscuit size: Medium to large
Tip: Sprinkle a tablespoon of sugar over your fruit and let sit for an hour or so in the fridge. You can use the juice that’s created to drizzle over your shortcakes for extra flavour and moisture before serving.
INGREDIENTS
- Whipped coconut cream
- 2 cans of coconut milk
- ¼ cup powdered sugar, sifted
INSTRUCTIONS
- Scoop out the coconut cream that rests near the top of the can into a mixing bowl, and leave behind any watery liquid (you can reserve this and add it to smoothies afterwards).
- Add 2 tablespoons of sifted powdered sugar to coconut cream.
- Whip with a hand mixer or stand mixer until light peaks form (10 seconds max to avoid over whipping).
- Assembly: Cut cooled biscuits lengthwise, through the middle. On the bottom half, top with coconut cream and fresh fruit and a drizzle of juices. Add biscuit topping before serving and fresh, fragrant herbs for garnish.
Serves: 6
2. Baked Fruit Cobbler
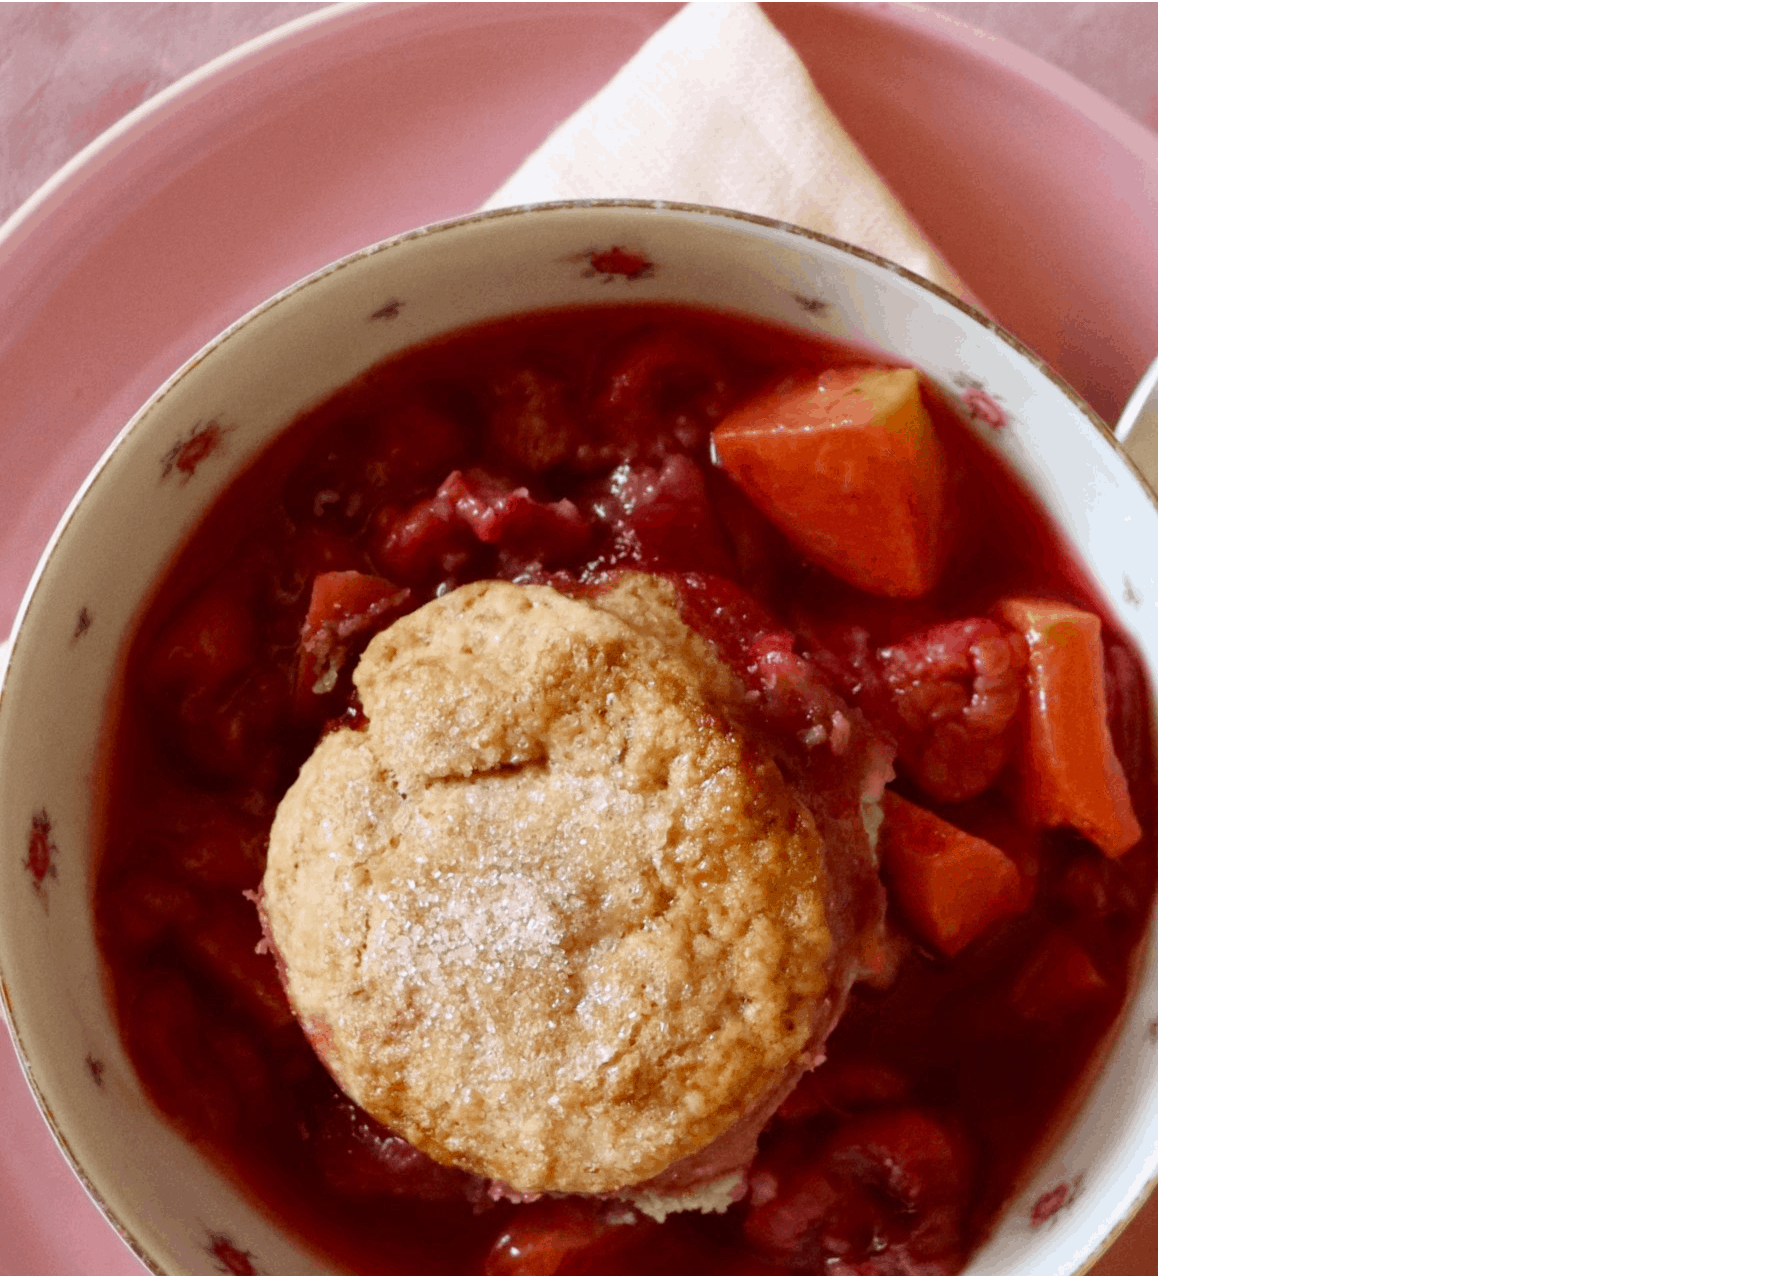 Ideal for: Fresh or frozen summer fruit you’re keen to use, but not eager to show off.
Biscuit size: Small to medium
Tip: Check cobbler at the 30-minute mark of the baking time and cover with tinfoil if biscuits are already golden, but your fruit still has a way to go.
INGREDIENTS
- 8 cups sliced fruit, fresh or frozen
- 2 tbsp corn starch
- 2 tbsp water
- 2 tbsp sugar
- Zest of one lemon, optional
INSTRUCTIONS
- Heat oven to 375 F.
- In a medium baking dish, lightly toss together fruit, corn starch, water, two tablespoons of sugar and lemon zest to combine. Set aside.
- Make biscuit recipe and gently lay your shaped biscuits over top of your fruit mixture.
- Bake in the centre of your oven for 45 minutes, or until thick cobbler juices are bubbling up the sides of your baking dish and biscuits are golden.
- Let cool slightly before serving.
Serves: 6
3. Biscuits with Summer Jam and Devonshire-inspired Coconut Cream
 Ideal for: Fresh or frozen fruit that needs to be used up or else it will be wasted.
Biscuit size: Medium
Tip: Because jam is quite sweet, there is no sugar needed in this Devonshire-inspired coconut cream. Left plain, it provides a rich and cooling contrast against the candy-like jam.
DEVONSHIRE-INSPIRED COCONUT CREAM
- 1 can of full fat coconut milk
INSTRUCTIONS
- Scoop out the coconut cream that rests near the top of the can into a mixing bowl, and leave behind any watery liquid.
- Whip with a hand mixer or stand mixer until light peaks form (10 seconds max, it can be over-whipped).
- Use to top cooled biscuits along with a sweet and fruit jam.
PEACH AND HERB JAM
- 9 finely chopped and pitted nectarines or peeled peaches, fresh or frozen
- ⅔ cup of water
- Juice of one lemon
- Sprig of rosemary or a few sprigs of thyme
- 1¼ cups of white sugar
- Chopped fresh herbs, optional
INSTRUCTIONS
- Add lemon juice and water to a large pot and bring to a boil on high.
- Once bubbling, add fruit and herbs.
- Safely pull out herb sprigs (if using) before adding ¼ cup of sugar at a time, stirring well between additions.
- Once all sugar is added, reduce heat to medium-low, and let the mixture bubble uncovered for 30 minutes or so, making sure to stir periodically to avoid hot spots and caramelizing.
- Once the mixture is thick and amber, remove from heat and let cool.
- When cooled, add desired amount of chopped fresh herbs before adding to a prepared container.
- If you aren’t using a traditional canning method, jam can be kept in the fridge for one week, or freezer for several weeks.
- If using a traditional canning method, jam should be kept in a cool, dark place.
Serves: 6