Learn how to avoid food waste—and save money too
Canning is an excellent way to take advantage of fruits and vegetables that grow in abundance in the summer months and preserve the healthy harvest for the cooler months.
It’s also a great way to avoid food waste and save money.
Here’s a crash course and step-by-step instructions if you’re a beginner looking to start canning this season. From pears to peaches and pickles, canning is a delicious way to make the best of your summer bounty.
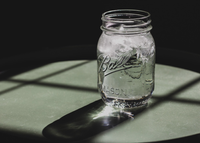 Photo by Ethan Sykes on UnsplashCanning methods

There are two main methods of canning: water bath and pressure. Either work well but are more suitable depending on what kinds of foods you are preserving.
For foods with a high acid content like fruits, tomatoes, jams and jellies and pickles, water bath canning is the way to go. It also works well for condiments, like salsas and barbeque sauces.
It’s also easier than using a pressure cooker, so more suitable for beginners.
Pressure canning is more suitable for meat and foods with a lower acid content.
Supplies: What you’ll need for canning
An absolute must in your canning pursuit is a large supply of Mason jars, with lids. While quart jars are the standard size for fruits and smaller vegetables, mini jars work well for jams and jellies, while larger jars are more suitable for larger pickles and the like.
In terms of accessories, lids with bands to seal in freshness are a must. You can’t go wrong with a funnel to get your preserves into the jars, as well as a jar grabber to get your hot jar out of the canner. Photo by Markus Spiske on Unsplash
How to prepare your jars for canning
Glass jars must be properly sanitized before canning to ensure that food will not spoil and to reduce the risk of foodborne illness.
If you have a dishwasher, the easiest method is to put the jars through a cycle on the hottest heat cycle possible, followed by a heated dry if you have it. Every extra bit of steam and heat helps.
If you don’t have a dishwasher, wash your jars in hot, soapy water—the hotter the better. Next, put them into a pot of boiling water and let them boil for 10 minutes. Lids and rings should be put into a pot of simmering water for at least a few minutes.
Sealing your jars
Whether you choose the water bath or pressure method to can your produce, you must ensure that your lids are properly sealed.
Use your jar grabber to pull out the jars from the canner and place them onto a flat surface. Then, you wait. For up to 24 hours. The jars will make a sound similar to a “ping” as the centre of the lid seals.
Never use a lid more than once.
What to can
Once you have learned the fundamentals of canning, now comes the fun part: Choosing what you would like to preserve.
As I mentioned earlier, water bath canning is easier for the novice. Here are four great types of preserves to start with as a beginner canner.
JAMS AND JELLIES MADE WITH THE FRESHEST FRUIT YOU CAN FIND
Jellies are easier than jams because you can leave the seeds in. To turn jelly into jam, you’ll need to take the additional step of juicing or puréeing the mixture
HOMEMADE PICKLES
 Photo by Natalie Rhea on UnsplashBest with smaller varieties of cucumbers, add in raw and peeled garlic and dill for an extra punch
TOMATOES
Whether puréed, whole or turned into salsa, fresh garden tomatoes preserve well and will keep throughout the whole winter. The more adventurous novice canner can even try their hand at ketchup.
 Photo by Anda Ambrosini on Unsplash
APPLES
 Photo by Priscilla Du Preez on UnsplashApples are more diverse than you think, and can be made into a number of different treatments: apple pie filling, applesauce, and apple butter.