With all the flavour of our favourite vegetables but grown in half the space, microgreens have quickly become the new “it” produce item
You've probably seen microgreens lining grocery store shelves. Not only are they deliciously packed with flavour, they’re also extremely high in nutrients. Once you’ve tried them and know which flavours you like, they’re easy to grow on your own and you don’t need an entire backyard to do it.
What are microgreens?
Microgreens are miniature versions of vegetables, flowers and herbs, and fall somewhere between a sprout and baby green. Where a sprout is a germinated seed, microgreens already have small leaves that are completely edible, and the plant is harvested earlier than a baby green, around 14 days after the seeds were planted.
Microgreens are high in nutrients
As a smaller version of vegetables like broccoli, kale, peas or radishes, microgreens hold a high concentration of nutrients in one small bite. They’re best known for being high in potassium, iron, zinc, magnesium, copper and antioxidants, and studies say that their nutrient content can be anywhere from four to 40 times their mature counterparts. They’re incredibly versatile, and many parents have had success with getting their kids to eat more greens by throwing microgreens on top of their favourite meals. They taste great in soups, sandwiches, as garnishes on bowls, blended in smoothies, and used to flavour your drinks or even water. The options for using microgreens are endless!
 Photo by Augustine Fou on UnsplashConvenient, fast growing, and easy to grow

Microgreens can be on the expensive side, and while there are an abundance of local microgreen growers to support, it can be fun to grow them on your own, especially if you consume them in higher quantities. You can also grow them year-round and have access to fresh food even in the middle of winter. You don’t need much equipment or a full-sized garden to grow these, either; all you’ll need are some seeds, soil, a container, water, and sunlight or grow-lights.
How to grow microgreens
- Spread an inch of potting soil in a shallow plastic tray (you can keep them to reuse them—they are the best for moisture control).
- Distribute microgreen seeds evenly over soil, and don’t worry about over-seeding. They need to be closer together because you’re harvesting them at a younger age.
- Lightly cover the seeds with soil and use a spray bottle to mist the top of the soil with water.
- Place your tray by the window or under your grow light.
- Mist or spray to water until the microgreens lightly daily.
- Wait until your microgreens are 1 to 3 inches tall (about 14 days after germination) and they’ll be ready to harvest.
- Be sure to read each microgreens’ needs carefully on the packet. Some require heavier sowing or more frequent watering.
- Enjoy a nutrient boost on anything and everything.
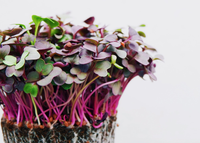 Photo by Devi Puspita Amartha Yahya on UnsplashTypes of microgreens

- Arugula
- Chives
- Mizuna & Mustards
- Chard
- Cabbage
- Beets
- Cilantro
- Mint
- Garden Cress
- Sunflower
- Kale
- Parsley
- Dill
- Carrots
- Celery
- Basil
- Fennel
- Amaranth
- Radish
- Broccoli