Keep waste out of the landfills and make your garden happy by composting your food scraps
“Compost” is a verb, since it’s a process that has a finished product: soil. Compost is a mild, slow-release type of organic “fertilizer” commonly known as “black gold.” Black gold is exactly what it sounds like: gold for your garden. The process it takes to make this black gold is pretty simple: you take your food scraps and rather than throwing them in the garbage and landfill, you put them into a bin or pile in your backyard. It sounds pretty easy, and it actually is. You just need to follow a few key steps for success, and we’ll go over this “how” below.
Why is composting great?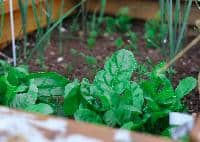 Photo by Sigmund on Unsplash

Did you know that 2.2 million tonnes of edible food is wasted in Canada each year? Each Canadian, on average, wastes 79 kilograms of food at home per year. As local landfills get bigger and we run of space, it becomes more expensive for municipalities (and homeowners/tax payers) to maintain. Not only that, but housing food in landfills doesn’t work. Organics don’t break down in landfills because there’s no oxygen for the microbes to be able to do the work. Since the landfilled food breaks down anaerobically (without oxygen), it instead produces methane gas, which is a greenhouse gas 21 times more harmful than CO2.
Rather than creating waste, composting helps to complete the circle and returns the food back to the land in order to grow even more with it. Even if you don’t grow food yet, compost can be used in flower and herb beds.
Using compost in your garden bed not only fertilizes your vegetables, but it also feeds the organisms in the soil, increases soil stability, improves drainage, and helps to retain moisture in the garden. All in all, composting uses less water, reduces costs and fuel use for waste collection, and reduces the need for commercial pesticides and herbicides, which keeps harmful chemicals out of our water streams.
Another plus: finished compost is better than fertilizer for your garden because it’s alive. One pound of compost contains millions of living organisms, and those organisms don’t just help your plants grow, but help them to fight off any diseases.
How to (easily) compost at home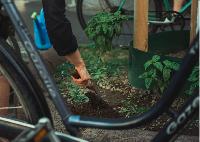 Photo by Jonathan Kemper on Unsplash

- Designate a spot outside for your bin and rodent-proof it. Cover the bottom, sides and top with quarter-inch steel mesh, then build a lid that opens with a hinge. This may sound like a lot of work, but you’ll be grateful when you don’t have rodents in your bin. The cover also helps to protect your pile from excess moisture/rain.
- Make sure your bin breathes. Remember that bit about food in landfills? You want to avoid it going anaerobic, so your container needs to have good air flow for that beautiful microbial action. This is a great step-by-step DIY container project, or I’ve seen people drill holes in their large Herby Curbies if they have an extra. Make sure it’s at least 3X3X3, which allows enough mass for the pile to heat internally and break down.
- Have an in-home container. It doesn’t need to be fancy. You can use a bowl that you throw in the freezer, a “cookie” jar, or you can buy a smell-proof can if you prefer. I find that my compost smells better than my garbage used to. Then, you can take it out once a week or as needed.
- Know what to throw in the bin versus what not to. Avoid: meat, fish, dairy products, cat litter and bones. Wash out eggshells before putting them into the bin. Also, avoid any products listed as biodegradable or compostable unless it specifically says, “suitable for home composting.” These materials will usually only break down in larger or industrial compost processes. Include: fruits, veggies, coffee grounds, tea bags (your green materials) and grass clippings, paper towel, shredded paper, leaves, sticks, sawdust, woodchips (brown materials).
- Build your layers. Using your “green” and “brown” materials, begin to alternate and continue building these layers. You should always top your green materials with brown ones. This maintains a good “carbon” to “nitrogen” ratio, which is the key formula for compost.
- Turn your pile. Grab a shovel or garden fork and turn your bin once a week to help with the breakdown process. This will ensure that your materials are evenly mixed. Note: if you’re not turning your pile, you could also add some red wigglers (worms) to help with the composting process and to add in worm castings (worm poop) to make your soil extra rich. Those worms love to eat food scraps, but do not turn the pile if you house worms inside your bin. The heat and impact will kill them.
- When finished, your compost should be dark, crumbly and smell like earthy, sweet soil. If it didn’t work, don’t beat yourself up over it. It’s a fine science, and may take adding more “green” or “brown” materials until you get it right. Don’t give up—it will take about six to eight months. It sounds like a long time to wait, but if you start at the right time, you’ll have beautiful, black gold by garden season.